The Curly Girl Chronicles: Part 3

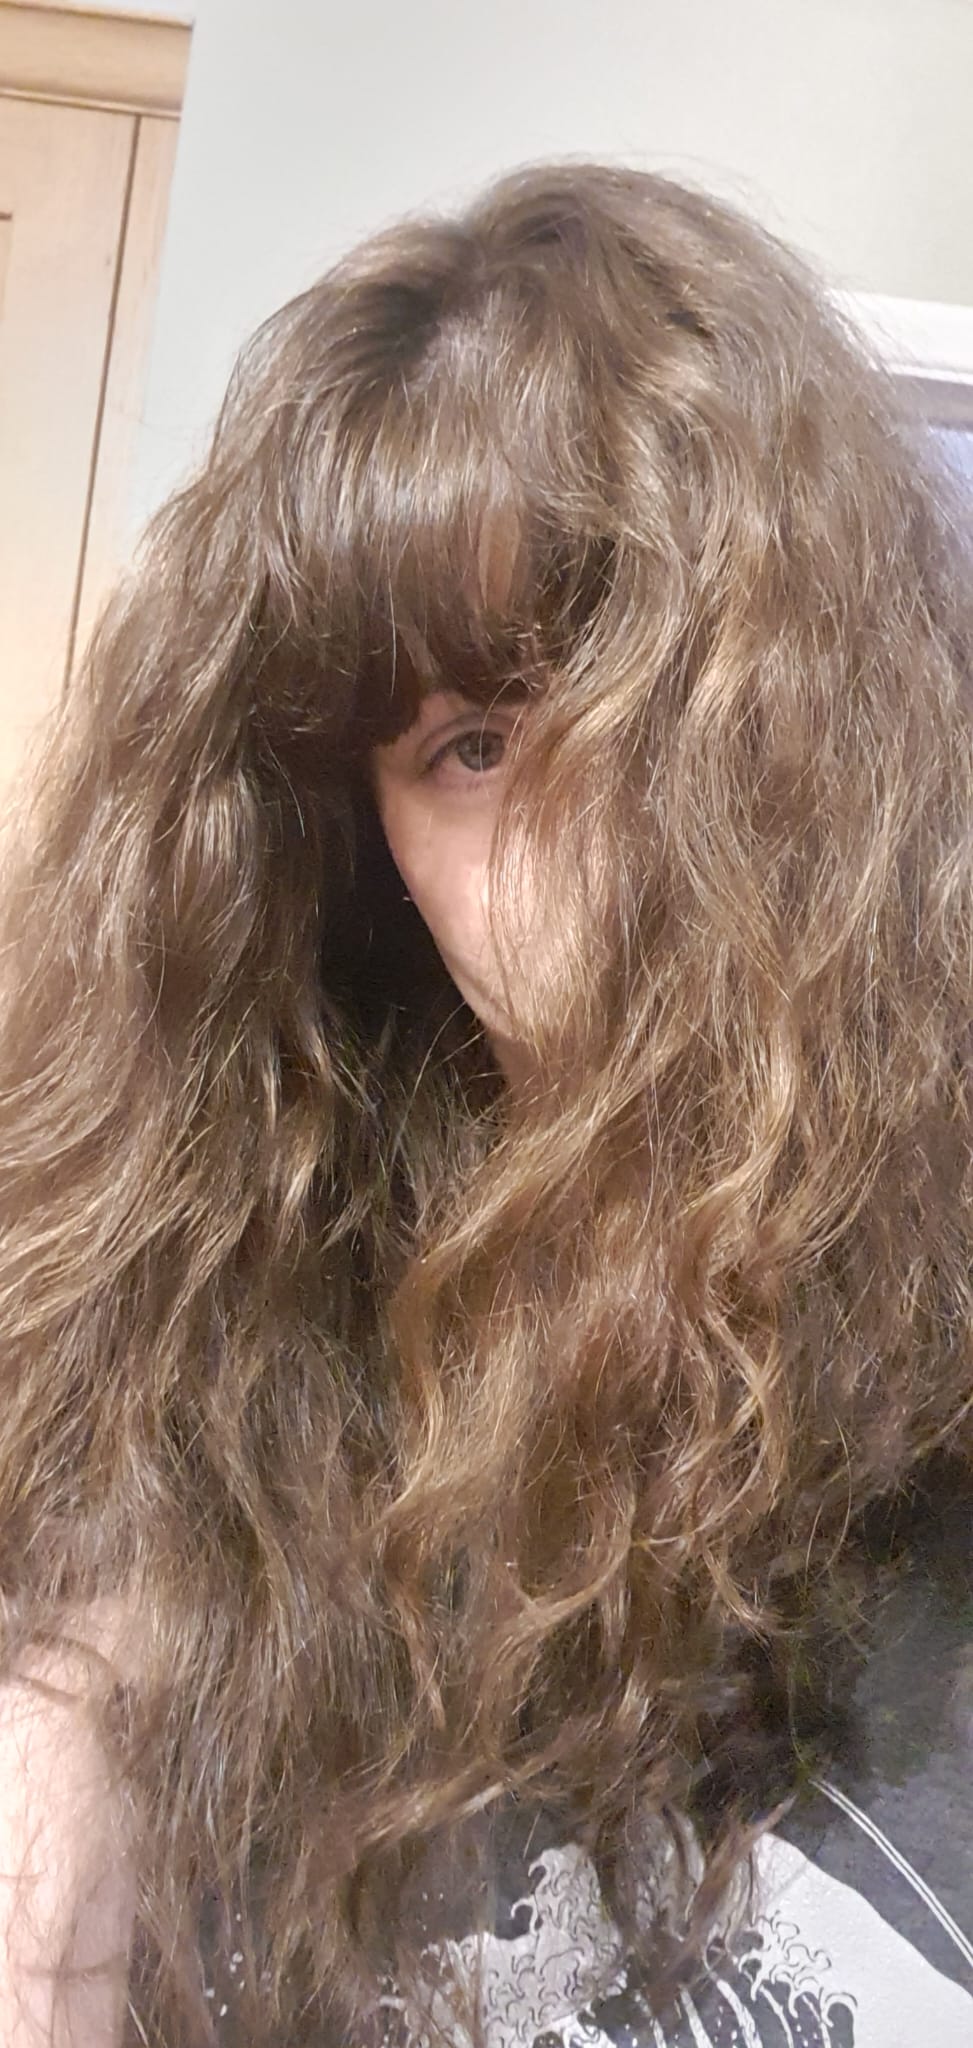
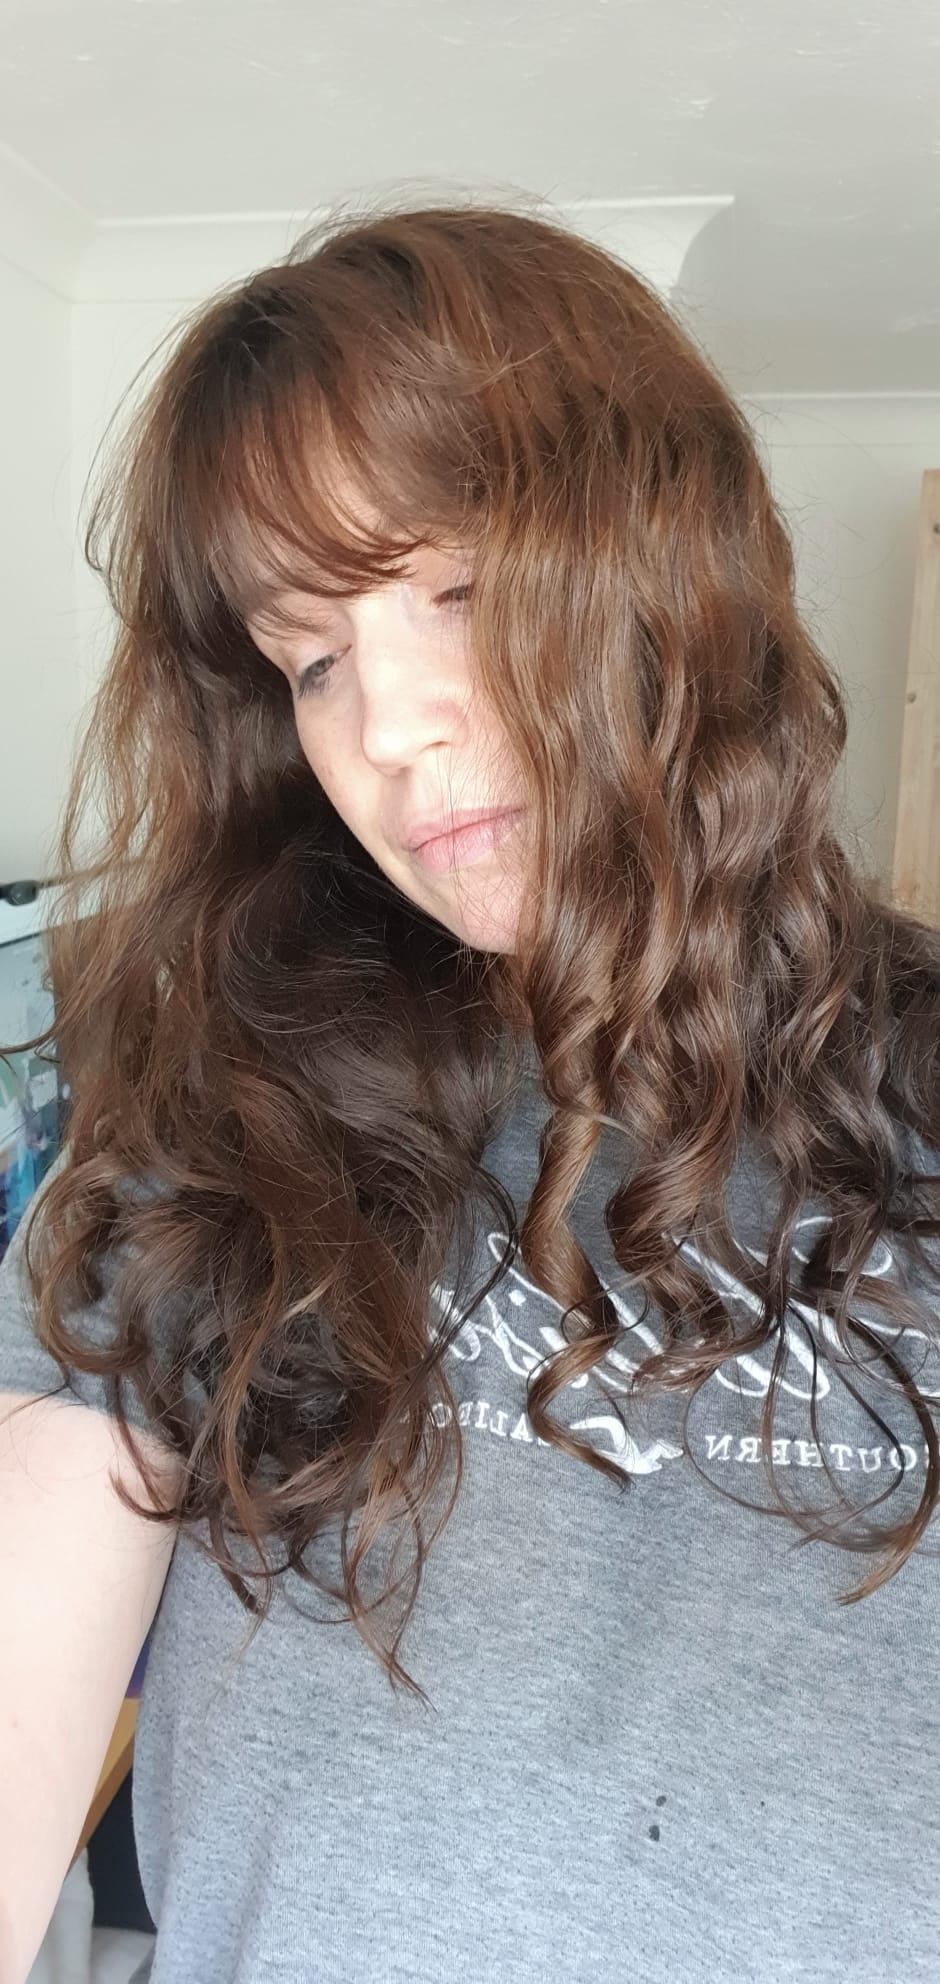
By Jove, I think I’ve done it. Readers, I have so much to report back on. First, let me show you where I’m at right now.

I am getting consistently good hair days AT LAST. Honestly, I wasn’t sure I’d ever see the day. But after several breakthroughs, which I will outline below, I feel as though I have finally cracked it. If I want a good hair day, I am now confident I can have one. Up until recently, consistency was my biggest challenge.

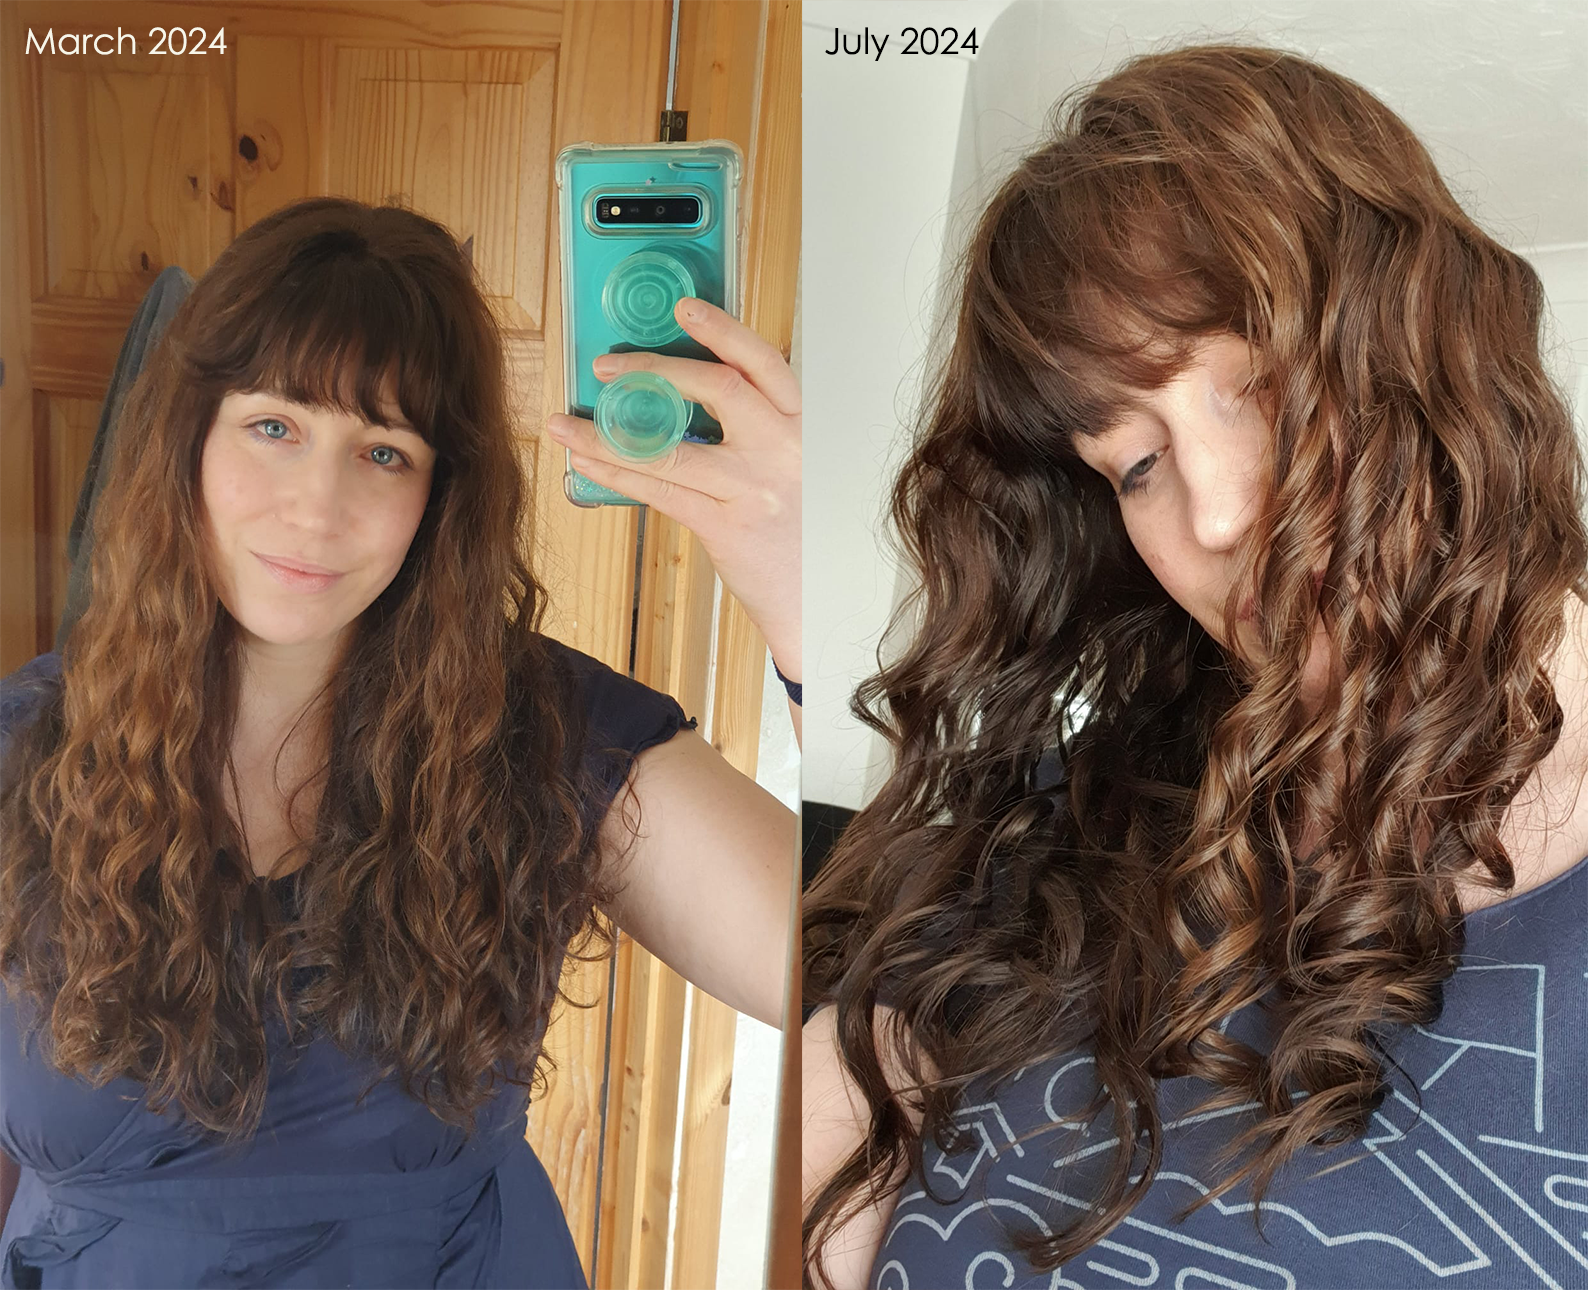
As a reminder, this is where I started back in March 2024…

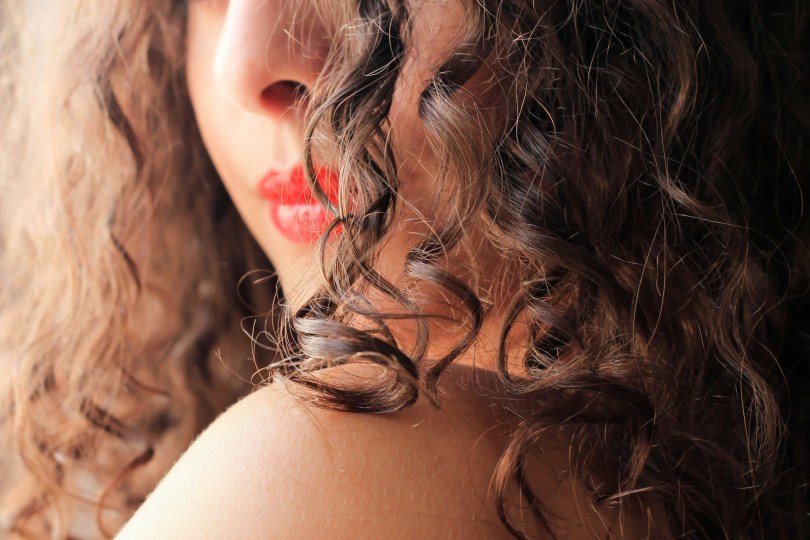
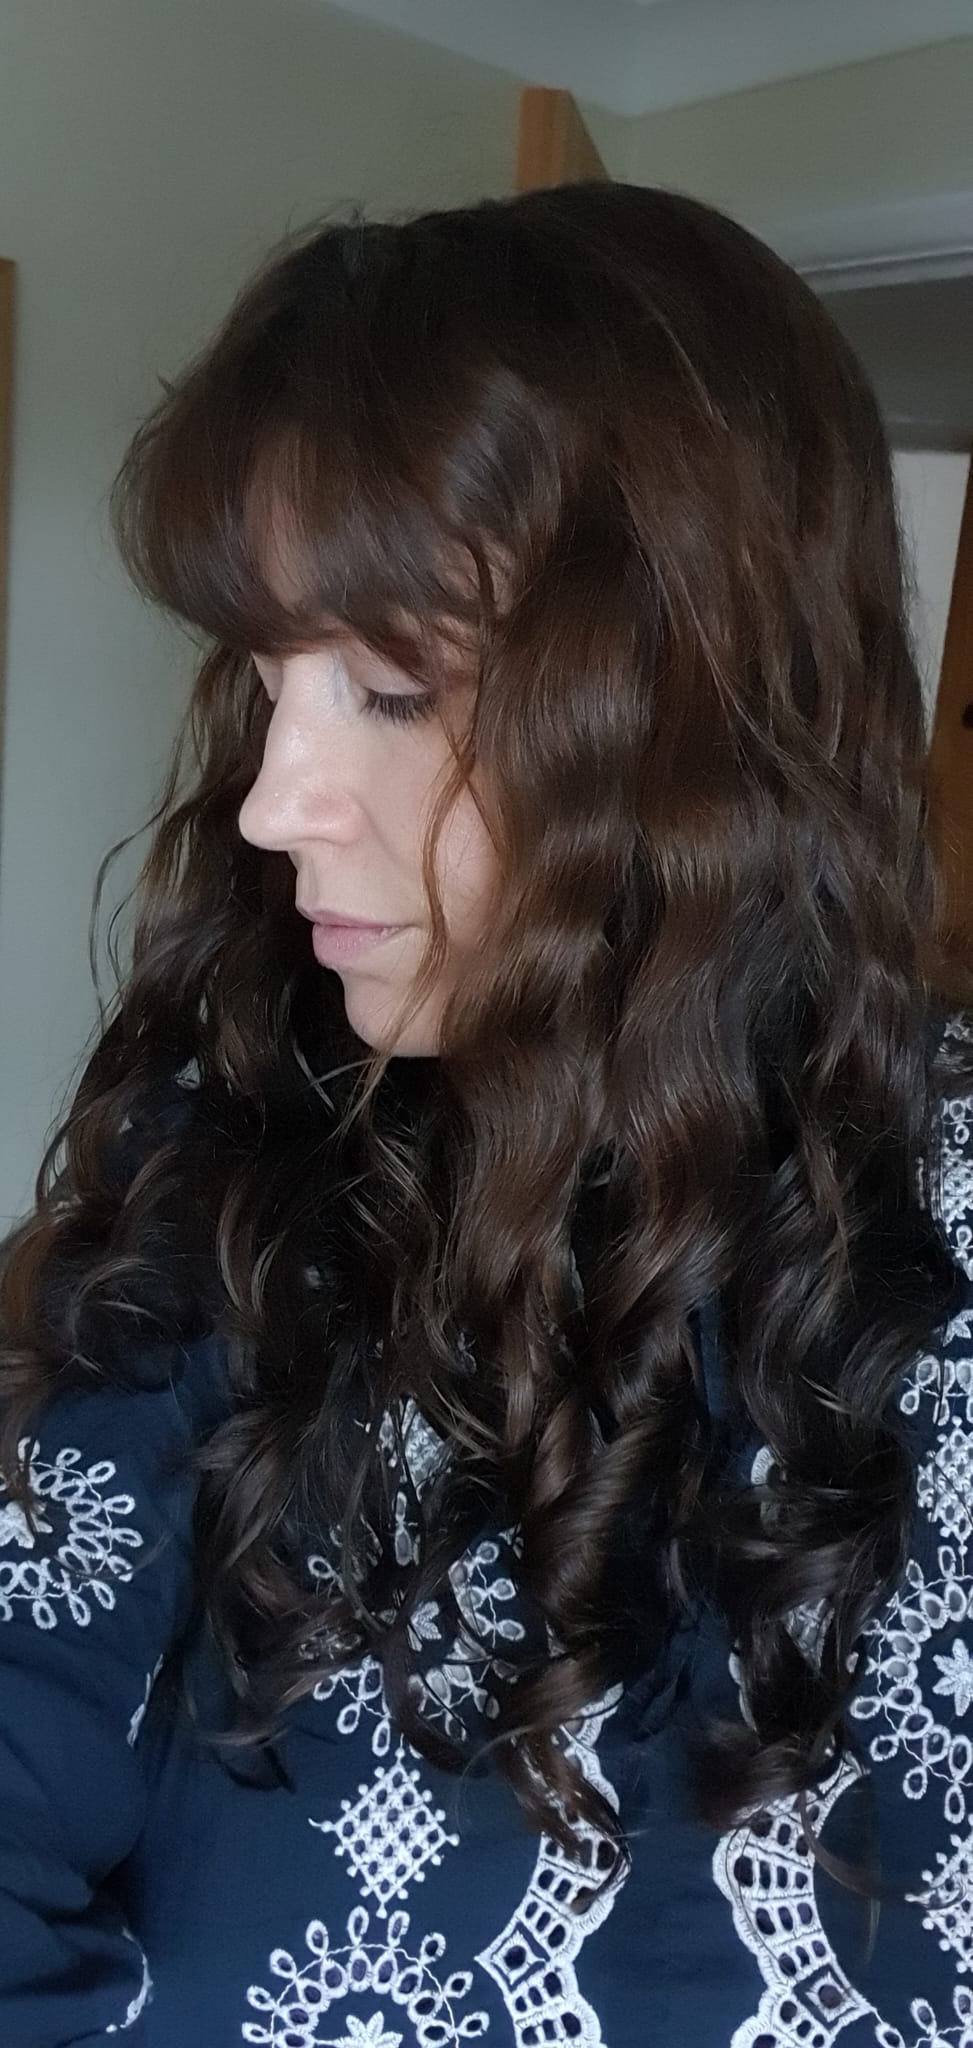
These are some photos from earlier in the year.

My hair type

I have 2c, fine, medium density hair. Medium porosity (as I cover greys) but my hair doesn’t like protein and doesn’t do well with too much moisture (I very rarely deep condition). My hair is balanced, but can lean slightly towards being dry which a co-wash usually fixes. If your hair is like mine, the following product recommendations might work for you, too. As an aside, I wash my hair every 1-2 days because I like that clean feeling, and because after day 2 my scalp is itchy. It’s fine to wash regularly, just make sure you’re not drying out your hair.

Wash day products

I have 3 wash days I cycle through, depending on what my hair needs.

1. This is my CGM-compliant wash day, and the one I default to.

Cleanser: Giovanni 50/50 Balanced Shampoo
Conditioner: Giovanni 50/50 Balanced Conditioner
Leave-in: Giovanni Direct Leave-In
Stylers: Giovanni LA Hold Natural Styling Gel

The shampoo makes my hair and scalp feel nice and clean, and the conditioner is a delight – very conditioning, but not too heavy, and has an amazing marshmallowy texture.

2. When my hair is feeling dry, I plump for a co-wash.

Cleanser: As I Am Co-Wash
Conditioner: Alberto Balsam Raspberry Conditioner
Leave-in: Curlsmith Shine Cream
Stylers: L’Oréal Invisi’Hold Extra Strength Gel

This co-wash is popular for good reason – it’s not too heavy, but it is still cleansing, and it smells amazing. It’s everything you could want in a co-wash. I use the Alberto Balsam conditioner with it, as I don’t need anything more conditioning than that.

The L’Oréal Invisi’Hold gel is my favourite gel of all time – super cheap (£3.50 in Tesco) and usually gives me a decent gel cast where others have failed. It is also glycerin-free (more on this later).

3. I have to clarify regularly, every 2-3 washes, and this is what I opt for:

Pre-wash: Forest & Shore Thrive Oil; I put this on for 10-15 mins before washing, and it helps to prevent my clarifying shampoo from drying out my hair
Cleanser: Garnier Hair Food Papaya Shampoo; the absolute best clarifying shampoo I’ve ever used – contains sulphates that I need in order to properly remove product build-up
Conditioner: Alberto Balsam Raspberry Conditioner (cheap, smells nice, does the job)
Leave-in: Curlsmith Shine Cream (tiny amount; I don’t get a gel cast if I apply too much leave-in)
Stylers: L’Oréal Invisi’Hold Extra Strength Gel

For all of these wash days, I use an oil at the end of the process to scrunch out my gel cast. I absolutely love Umberto Giannini Curl Oil Bond Repair. I use 2 drops to SoTC.

Why so many products?

If you’re wondering why I don’t reduce the amount of products I use by, for example, using the Giovanni shampoo and conditioner with the Curlsmith leave-in and L’Oréal gel, it’s because these products don’t play nicely together. I have tried countless product combinations, and have figured out what works best.

The four essential stages of washing and styling

It’s important to understand the basic washing and styling process. In order, you will need to…

Wash and detangle: shampoo and condition, making sure you brush conditioner through the hair to ensure it’s evenly coated (and detangled). Rinse thoroughly.

Form your curl clumps: while hair is soaking wet, use a brush (you can’t go wrong with the Tangle Teezer for fine hair) to detangle. Add more water to the brush if you need to, for more slip. Then, divide up your hair (I divide mine in half) and apply leave-in (I use a pea sized amount or less for each half of my hair). Brush style (more on this below), then microplop using a pulsing motion (do not aggressively scrunch). Rope and gently scrunch on gel. Microplop again. Gently scrunch in more gel. Then leave hair well alone for 10-15 minutes before diffusing.

Dry your hair: I allow my hair to air dry at first (usually while I’m wearing my husband’s t-shirt) for at least 10 minutes before I use the diffuser. It’s important to diffuse when curls have the structural integrity to withstand it. When I tried hover diffusing immediately after getting out of the bath, I would end up with frizzy hair as the curl clumps would fall apart without having had a chance to set.

Break the gel cast: once your hair is fully dry, you’ll need to scrunch out the gel cast to get those bouncy, shiny curls. You don’t need an oil to do this, but it’s generally recommended especially if you have a strong, crunchy cast. I love the Umberto Giannini Curl Oil because it’s lightweight, adds a lovely shine, tames flyaways and is inexpensive.

On the subject of drying: I love the Curlsmith Defrizzion dryer. I managed to get it in the sale for just over £100 and it’s totally been worth it. Best dryer I’ve ever owned. The hairfluencers seem to love it, too – it’s renowned for being the quickest diffuser on the market.

Brush styling technique

Brush styling (and the correct way to do it): this video says it all.

https://fb.watch/wHoNsHBWrU/

I use the Tangle Teezer designed for fine hair. Not only does this give me the best results of all the brushes I’ve tried, but it’s also the brush every single hairfluencer seems to use (for good reason, I suspect). If I wanted more volume then I would go for the Bounce Curl brush which gives me smaller curl clumps.

Gentle curl clump formation is key to preventing frizz. I used to scrunch aggressively thinking that’d be sufficient and I would get a lot of frizz as a result. Remember: wet frizz = dry frizz. I was in denial about this for a long time, hoping my hair would magically fix itself during the drying process.

How you dry your hair matters

Curl clump preservation during the drying process is key. A few important things I learned:

  • Microplopping with this Curlsmith microfibre towel really reduced my wet frizz (remember: wet frizz = dry frizz). I had been using microfibre towels before, but this one made a huge difference.
  • Waiting at least 10 minutes before hover diffusing, so the curl clumps have a chance to set and solidify. This sounds trivial but this simple tweak to my routine made a huge difference.
  • Diffusing on high heat, low speed. I’d been diffusing on medium heat, high speed, and in doing so was disturbing my curl clumps, creating frizz in the process. Switching to low speed, high heat made a big difference.
  • Touch your curl clumps as little as possible during the drying process.

Bonus tip: a curly friend of mine messaged me a few days ago to say she’d had great success drying her hair in front of the radiator! I’ve yet to try this myself, but I can see why it would work so well, especially in the winter. I hate having wet hair in the cold weather and so the thought of sitting close to a warm radiator and allowing my hair to dry whilst reading my book appeals so much more than diffusing for 20-30 minutes. I will try this and report back, but I have photographic evidence of how good her hair looked as a result of doing this, so I am confident to recommend this rather hygge approach to hair drying.

Silicones

Having said in an earlier post I wasn’t going to return to using silicones, I did a total 180 on this and experimented extensively with them. The TL;DR is that I very rarely use silicones now. In general, these are something I aim to avoid.

Why?

  • Build-up. Even if I’m using a well-formulated shampoo and conditioner containing a mix of water soluble and non-water soluble silicones (e.g. Redken’s Acidic Color Gloss shampoo and conditioner) the silicones still build up. The first time I used this shampoo and conditioner combo I was blown away, but subsequent results (a week later) were underwhelming. Silicones add slip, and create a hydrophobic later on the hair shaft. Both of these things will mean that your hair will struggle to form nice, fat curl clumps. You’ll find that your curls might look stringy and separate during drying. This is exactly what I found when I used those products twice in 10 days.
  • Hair health. There’s no escaping the fact that silicones create a hydrophobic layer on the hair that will dry your hair out in the long term, impacting curl formation. When I first stopped using silicones, my hair was very dry and I struggled to hydrate and condition my hair. Now my hair has recovered and is balanced, but I have seen first hand how silicones dry out the hair. They can also leave hair greasy, especially with prolonged use. If you’re someone who finds that their hair feels greasy at the end of the day even though you washed that morning, it’ll almost certainly be because you’re using products containing silicones.

When do I use silicones now?

I have an anti frizz serum that contains silicones that I only use in emergencies. Very occasionally I might use the Redken shampoo and conditioner mentioned earlier, but I wouldn’t want to do this more than once every 2-3 months.

How do I get rid of silicone build-up?

You need to wash these out of your hair using sulphates, there’s no avoiding it. When you first start your curly journey you will have to be patient as it’ll take several clarifying wash days to get rid of them. You might find that your hair feels dry and brittle without silicones, and this is because you’re used to the slippery, Teflon feel of them on your hair. But underneath that hydrophobic layer, your hair will have been starved of moisture.

Glycerin

This was a major breakthrough for me. I’d read about people cutting out this ingredient from their routine, and when I finally did it, I got the most incredible results.

My hair doesn’t like glycerin. And, as it happens, glycerin is a tricky ingredient. It works only within a certain humidity range, for starters. I have medium/high porosity hair, which means my hair gets wet and dries quickly (which I’m honestly glad of). Some medium/high porosity hair can struggle with glycerin, especially in very dry or humid environments. This is because glycerin is a humectant. In very dry climates, it’ll pull the water from your hair and dump it into the air, drying out your hair. In very humid environments, it’ll pull the water from the air and push it into your hair, ruining your curls and giving you a fluffy look.

I was using the Umberto Giannini Curl Jelly for a time, but found in the summer it was drying out my hair. I tried the well-reviewed Curlsmith Shine level 9 stronghold gel and experienced flash drying, after which my hair formed crispy, thin, wavy strands and looked absolutely terrible. I had to rewash my hair after using any gel containing high levels of glycerin.

When I switched to the (glycerin-free) Giovanni LA Hold gel, everything changed. I also adore the L’Oréal Invisi’Hold level 8 stronghold gel which doesn’t contain glycerin, either. If you’re finding that, no matter what you do, you’re still getting quite a lot of fluff and frizz, try cutting out glycerin.

    Garnier have changed their Hair Food formula

    Earlier this year, Garnier decided to add shea butter to its 3-in-1 mask. This was a huge blow as I’d been getting excellent results with this, and then was baffled when suddenly I wasn’t. Some research showed that they’d changed the formula as well as the packaging (I contacted Garnier, who confirmed the change), and now these products don’t work for my hair because the shea butter is too heavy. Thankfully, I’ve since found better products, but for a while this was a real blow and felt like a massive step back.

    Product recommendations

    As well as my wash day products mentioned above, I also love…

    The Curlsmith Flawless Finish Flexible Hold hairspray. This adds quite a lot of grit and texture, so I only use this if I’m going out for the day and I want my curls to remain intact. But it is very effective, and it actually adds definition which is useful if I’ve had a less-than-perfect wash day. I find I want to wash my hair the day after using this, simply because I don’t love the texture, but it’s great on the day and smells lovely too.

    I’m a fan of Umberto Giannini’s No More Frizz serum HOWEVER it is important to note that this contains silicones. I rarely use this product, but having it on standby when I screw up a wash day gives me huge peace of mind. This is for hair emergencies only, as the silicones have to be removed using sulphates, and your hair might need several washes before those silicones are completely gone. I only use this when really desperate, and I have to clarify afterwards. My hair does feel slippery after application, like it’s been coated in Teflon, which I don’t love BUT it does fix the frizz problem. If I need to be somewhere and look half-decent, it’s nice to know I can lean on this if I have to. It is incredibly effective.

    Final thoughts

    I appreciate that if you’re new to the curly hair journey, the information above might feel incredibly overwhelming. Figuring out one’s naturally curly hair takes a lot of time – months or even years. THIS IS NORMAL. It takes a while for our hair to remember its curl pattern, and most of us had been using silicones which take a while to wash out of our hair. A transition stage is normal, and you’ll find during this period that your hair is particularly unpredictable. Don’t worry. And also, don’t be afraid to take a break if you need to. I went through months of bad hair days, when every wash day resulted in disappointment. When I lost patience with my hair, I stopped styling but continued using silicone-free shampoo and conditioner. When I resumed my styling attempts, I wasn’t having to contend with silicone build-up.

    I could fill a blog post full of photos of my bad hair days, and I’ve had to come to terms with the fact that if I don’t style my hair, it is fluffy by default (people who have naturally straight hair simply don’t experience this). The path to success has been long and arduous. But I am there, at last, and now my curly hair feels like an unexpected midlife gift.

    Curly Girl Part 2: Progress and Lessons Learned

    I last posted about my curly girl adventures five weeks ago, but in that relatively short time I’ve made some progress and learnt so much that I figured I’d share my findings. I’m taking you on this journey with me!

    In terms of progress, my hair is looking better. And by better I mean: my curls are increasingly more defined. This is my best hair day so far…

    Check out those ringlets 🙂

    I’d heard online about the ‘transition phase’, and I suspect that’s where I’m at right now. The more I encourage my curls to form, the more willingly they seem to do so. The right products help, too, of course – removing silicones from my routine has allowed my curls to curl. I’m getting better at figuring out what products work for me.

    In terms of lessons learnt, here’s what I’ve discovered so far:

    Lesson #1: You probably don’t need to worry about protein vs moisture balance, especially at the start of your curly hair journey

    Unless your hair is very damaged (because you bleach your hair, spend a lot of time in the sun, swim regularly in chlorinated pools, heat style on the daily, etc) you don’t need to worry about this. There’s no harm in making sure you’re using the right conditioning products for your hair (as it might be on the dry side initially, once you cut the silicones). But unless your hair has obvious damage, chances are your hair is already pretty balanced. If so you’ll find (as I did) that adding protein leaves your hair dull and straw-like (this is known as protein overload), and going overboard with the moisture (cowashes, or deep conditioning masks) leaves your hair lacking curl definition (your gel will also struggle to form a cast on over moisturised hair). In short: unless your hair is really damaged, don’t worry about this just yet. (And if your hair really IS damaged, then you’ll want to try something like the Curlsmith Bond Curl Rehab Salve which is a bond repair treatment containing protein.)

    Lesson #2: Most curly girls aren’t strictly following the Curly Girl Method

    Lorraine Massey actually created the Curly Girl Method for Black hair, which is typically thicker, more coarse, and needs those heavy oils for taming tresses and frizz control. This means that, for many (and especially those with fine hair), following CGM strictly means that their hair becomes nightmarish quite quickly.

    Some hairfluencers use stronger sulphates like SLS for clarifying, some re-introduce silicones into their routine for added shine, some never use cowash. Ultimately, you will need to tailor your haircare routine to suit you and your hair, but the Curly Girl Method can be a useful jumping-off point.

    Lesson #3: You might need sulphates in your routine

    One of my major breakthroughs came after I realised I needed SLS in my routine. I have fine/medium hair that is prone to build-up and, after struggling for months with several sulphate-free clarifying shampoos, I eventually used a shampoo containing SLS. Suddenly my hair was a MILLION times better – my curls started to form again, and my hair was no longer fluffy (a result of product build-up). Here’s my before and after:

    03/05/2024: Before I realised I needed SLS… (look at that grumpy face!)
    04/05/2024 (just one wash later): Phew! Still a bit of frizz, but my curls had made a dramatic reappearance.

    If you’re on the curly path and struggling with lacklustre results, I recommend spending £3.25 on Simple’s Gentle Care Shampoo that contains SLS but is otherwise a gentle formulation. I also love the Garnier Hair Food papaya shampoo (used in my ‘after’ photo, above); after all my product experimentation is over, I strongly suspect this will be the ‘clarifying’ shampoo I end up leaving in my routine.

    Lesson #4: Not all silicones are created equal

    The official Curly Girl Method takes a hard line when it comes to silicones, and excludes them from their method entirely, but I know some curlies who still use them.

    I choose not to include silicones in my routine right now because most silicones you find in shampoos made by the big brands (L’Oréal, I’m giving you the stink eye) contain silicones that aren’t water-soluble. This means that they are quick to build up on the hair, hard to remove, and can leave your hair feeling greasy. Because of the way they sit on the hair shaft, they can lock out nourishment or benefits from other products you might be using. They can also leave your hair more dry and brittle in the longer term, because they make it harder for moisture to penetrate the hair shaft. My hair was dry after removing silicones from my routine for this reason (it has since recovered).

    I experienced silicone build-up prior to embracing my curly hair, too – I would end up with greasy roots, dry ends, and needing to wash my hair daily. Now that I’ve switched to silicone-free products, my hair stays cleaner for longer.

    When it comes to silicones, you have (in my humble opinion) two decent choices:

    • remove them from your routine entirely and focus on giving your hair the emollients and conditioning agents it needs (the approach I’m opting for right now), or

    Water soluble silicones:

    • Cyclomethicone
    • Dimethicone copoyol
    • Laurl methicone copolyol
    • Any silicone with PEG as a prefix

    Non-water soluble silicones:

    • Amodimethicone
    • Amodimethicon
    • Ceteraryl methicone
    • Dimethicone
    • Dimethiconol
    • Pheryl trimethicone
    • Stearyl dimethicone

    Silicones aren’t inherently bad, and if you’re someone with very damaged hair some silicones can help prevent further damage because they coat the shaft and reduce friction between strands. They might be a useful (if perhaps only temporary) tool while your hair recovers from, say, bleach damage.

    If you decide to move away from them, though, the transition to silicone-free can be rough. Silicones, by adding a smooth layer to each hair strand, can make your hair feel thicker and look more shiny. And because they coat the strand, they can also tackle frizz quite effectively. My hair has more body and volume these days, but is more prone to frizz and looking ‘fluffy’ unless I’ve done a good job in selecting the right stylers (e.g. a leave-in or curl cream, and stronghold gel that leaves a good cast). In future, this shouldn’t be the case – I should see, over time, an improvement in hair health and manageability on the days I don’t use stylers.

    If I were to reintroduce any silicones into my routine in future, I would make sure to wash them out using a sulphate shampoo (something containing SLS) and I would only use them occasionally in a styler, e.g. an anti frizz serum, or a hair cream designed to protect against humidity. Right now, I’m keen to see if I experience what other curly girls say they experienced during their hair journey – a visible improvement in hair health after removing silicones and using sulphates sparingly.

    Lesson #5: Start with the expensive products (yes, really!)

    Not just the (relatively) expensive ones, but the ones that are recommended repeatedly online by the people trying these products for a living (a.k.a. the hairfluencers). This advice might surprise you, but I’ve ended up spending so much more on haircare trying to find cheaper versions of higher end products. When I say expensive I mean brands like Curlsmith as opposed to TRESemme. You’re much better off with a brand that specialises in curly hair than a better-known brand like Pantene or Aussie who claim they’ve formulated something for curly hair. Garnier is the only exception to this rule I’m aware of: the Garnier Hair Food range is decent for curly hair (and many of those products are CGM-approved), but overall I would say: do not wander down supermarket aisles scooping up any product that says it is suitable for curly hair. There is a consensus online typically about what is good and what’s not. Take the advice.

    Another upside of this approach (aside from saving time and money) is that if you’re not getting the results you want, you’ll know it’s a technique or product amount problem. There are so many variables when it comes to figuring out your curly hair that it makes sense to try and remove one (product quality).

    I can recommend starting with the Curlsmith Shine range – you can often find the kit discounted on sites like Look Fantastic, or you can buy the travel versions (Curlsmith do 4 for 3 on these, totalling £30 to try the whole system). I wouldn’t recommend starting with the moisture (orange) or protein (purple) ranges – these are products for people who know what their hair needs, and at the beginning it’s very difficult to know. I got to protein overload by using too many products in the purple line, product build-up by not using SLS, and moisture overload by cowashing my hair too frequently. The silver lining here is that at least I know what these states look like on my hair now.

    Lesson #6: Diffusing technique

    You’ll commonly see ‘hover’ and ‘pixie’ diffusing in tutorials, but I found that I needed the ‘cupping’ technique, and to ‘plop’ (rest) my hair on a surface (usually the bed), placing the diffuser on its side to dry my hair. Fine hair is prone to wonky curls during the diffusing process, especially if you’ve not managed to get a decent gel cast, so taking a more careful approach here will really pay off. Gena Marie demonstrates what I mean perfectly here and WavyCurlyAli demonstrates what I mean when I refer to ‘cupping’.

    Don’t forget that diffusing upside down will give you more volume. You might want more volume, you might not, so tailor your approach accordingly.

    Lesson #7: Keep a journal

    I was so resistant to this at first. I didn’t want the hassle or the overhead, I thought I could remember all the products I used and the results I’d gotten from them. After 10 days I realised how naïve I was. I now have a digital journal in OneNote that I upload photos to, but if you prefer pen and paper, Hanz Curlz does a lovely hardback one.

    Journaling, in my experience, also protects against a kind of ‘hair dysmorphia’ where you think you’ve made zero progress with your curls but you are, in fact, seeing improvements. I only know how far I’ve come because I have photo evidence.

    11/05/2024: Results from using a curl cream (Noughty) that my hair didn’t like at all
    14/05/2024: Results from using a curl cream that DID work! Curlsmith Hold Me Softly Style Balm is great quality (and very concentrated).

    Lesson #8: Know what each product is for

    This probably sounds overly simplistic, but getting this clear in my mind helped hugely.

    Shampoo: cleansing. That’s all it needs to do, and it needs to do it well. Shampoos that try to combine some kind of treatment with a cleanser are not worth the money (according to most experts online, including the Blowout Professor).

    Current favourites: Only Curls All Curl Cleanser (felt quite drying to me at first, but results are always good), Umberto Giannini Scalp Restore Shampoo (contains pineapple extract so can feel a bit tingly on the scalp, but my curls seem to love it), Curlsmith Shine Shampoo (very gentle, very effective – best results I’ve ever had).

    Conditioner: adding moisture. Your hair might need more, it might need less, but we all need it. And we should only leave a conditioner in our hair if it is formulated for that purpose.

    Current favourites: Garnier Ultimate Hair Food Papaya 3-in-1 (my inexpensive go-to, which I use on days when I can’t be bothered to style my hair), Only Curls All Curl Conditioner (smells delightful and is lovely to use), Umberto Giannini Scalp Restore Conditioner (great slip, great conditioner – Hanz Curls is a fan of this range too), Curlsmith Shine Conditioner (gives just the right amount of moisture, best results I’ve ever had).

    Curl cream / leave-in conditioner: moisture and definition. I always get better results with (the right) curl cream. This contradicts what I said in my last post (forgive me), after I was told by a curl specialist that I didn’t need a curl cream. I disagree, as do the hairfluencers online. All of them use either a curl cream or a leave-in. And hair expert the Blowout Professor says everyone (even those with straight hair) should be using a leave-in conditioner every wash day to keep moisture in our hair.

    Current favourites: the Curlsmith Shine Cream and the Curlsmith Hold Me Softly Style Balm. Both of these are very concentrated so should be used on very wet hair and in small amounts at first. It’s easy to go overboard with curl cream in general, but in particular the Hold Me Softly Style Balm is very concentrated so go easy (this is from the Curlsmith moisture range, which typically contains heavier moisturising ingredients like butters and oils).

    Gel: for hold and definition. Without this, your curls probably won’t last the day, especially if you have fine, soft hair. Don’t be afraid of a stronghold gel, or a gel cast – if the product is a good one you won’t feel anything in your hair once you’ve scrunched out the crunch, and a gel cast is essential for preventing frizz and protecting your curls as they dry.

    Current favourites: Umberto Giannini Curl Jelly Scrunching Jelly (popular for a reason! Medium hold, best gel cast I’ve had so far, and the packaging is aesthetically pleasing and tactile), Curlsmith Shine Jelly (a great gel for beginners – medium hold, but doesn’t form much of a cast). I want to try the Curlsmith In-Shower Style Fixer next, as this is recommended regularly online and is very strong.

    Oil: for scrunching out a gel cast and sealing/finishing the ends of your hair. You need the tiniest amount – just 1-2 drops rubbed between your palms before you start scrunching.

    Current favourite: Umberto Giannini Bonding Oil. I love this stuff; affordable, leaves my hair glossy, does a great job helping to scrunch out the crunch, and I love the packaging.

    Mousse: volume, light hold. I don’t use mousse in my routine currently because I don’t like the texture on my hair (texture is useful for hold, though). I need a stronger hold than a mousse alone can provide, and I prefer that my hair doesn’t feel rough; I don’t like the grit and texture I get from a mousse.

    Lesson #9: Keep tabs on what you’re trying

    I have a whole separate OneNote doc for this, listing current favourite products, ones I’ve tried and hated, and what I’d like to try next. This is especially important if you’re going to dive into cheaper products to find what works for you – you’ll end up trying a lot to find what your hair likes.

    Lesson #10: Brush style for best results

    If you want max definition and less frizz, you can’t beat brush styling. I wish this wasn’t true, but it is. That said, you can take a lazy approach, you don’t need to be a perfectionist with this. I don’t section properly, I simply roughly divide my hair into four sections and brush style (with tension – Hanz Curls demonstrates this really well). The Bounce Curl brush (dupes can be found on Amazon!) is great for beginners, and the Tangle Teezer is another solid choice (I own and use both – you’ll see them recommended online a fair bit). Brush styling was my second major breakthrough. As I brush-styled my wet hair, I saw my curls forming before my very eyes. It was like having X-ray vision, being able to see my curl pattern in my wet hair.

    Lesson #11: Just because it’s CGM-approved doesn’t mean it’ll work for your hair

    This is particularly true, I think, of the heavier products designed for thicker coils. Many CGM-approved products contain oils and butters which are too heavy for fine hair. What works well for wavy hair won’t work for coily hair – those two hair types are so different. Thicker, tighter curls might need relaxing (weighing down) whereas wavy/curly fine hair will likely need lighter products that encourage curl formation.

    I hope this helped, and if you have any tips of your own you’d like to share in the comments, I would love to hear them. Lord knows I need all the help I can get! 😉

    The Cult of the Curly Girl (Method)

    [PLEASE NOTE: I have posted an update on my curly hair adventures in a newer post: Curly Girl Part 2]

    You may or may not be familiar with the Curly Girl Method. In short: 50 percent of the population (apparently) have naturally curly or wavy hair, and with the right products and techniques, you can have glorious curly (or wavy) tresses, too.

    The Curly Girl Method (CGM) has reached a kind of cult status online, and I understand why. Most of us don’t know that we might have naturally curly or wavy hair, and we are using the wrong products for this hair type. Unless I’m using shampoo and conditioner (and styling products) that are designed for curly hair, my hair will simply look slightly wavy (as pictured, below).

    I will have plaited my hair earlier in the day whilst wet, giving it a gentle wave.

    I discovered my curly hair by accident, by inadvertently using CGM-approved products and letting my hair air-dry one day at home (I usually plait it when wet, which disrupts the natural curl pattern, but that day I didn’t). I walked past a mirror en-route to the loo and did a double-take. I had ringlets at the bottom of my hair. I quickly snapped a photo and sent it to my friend, who had been on the curly hair journey for a while. Her reply was along the lines of: “You’re a curly girl, too!” Frantic googling ensued, and I purchased some products designed for curly hair (not realising my existing shampoo and conditioner were actually CGM-approved).

    It is an understatement to say I didn’t have much success at first. In fact, I nearly gave up. To anyone considering this journey, you must know it isn’t an easy one. You need to be ready to try something new. Your lifestyle (and ego) needs to be able to handle a bad hair day. Having had so few in my lifetime (I now realise), this came as a shock to me. Some days I’d apply too much product, or simply one not suited to my hair type, and I’d end up with dull, stringy hair. Other days I’d use insufficient styling product and have great curls for about an hour before they dropped out.

    My first semi-successful attempt was with the OnlyCurls starter kit. At the time, I thought this was the best I could do. And to be fair, it was a big change from my usually quite straight hair.

    Shortly after this point in my curl journey, I went on holiday with a group of women, some of whom were curious to try these new curly products. I secretly wondered if, actually, everyone’s hair was capable of being at least wavy, but I was proven wrong; some women experienced a similar transformation to the one I’d had, but for others, their hair remained poker-straight. The right products can only enhance naturally curly or wavy hair if you actually have it to begin with.

    My obsession grew. I purchased more products, and found ones I liked more. I found I could get a decent curl sometimes, but that those curls would fall out quickly. Apparently this isn’t uncommon for type 2 hair (I have 2c/3a curls). I went to see a curl specialist in the area, and had a curly cut. I didn’t realise back then, but this was actually a big commitment to the curly cause.

    Although I knew what products and techniques Anna had used on me in the salon (she’s an OnlyCurls stockist), I still struggled when it came to consistency. I knew I needed to use a stronger hold styling product, but my primitive attempts at using a gel hadn’t resulted in much success. One day, I bit the bullet and used Noughty’s Hey Curl scrunching jelly, applying it to my (very) wet hair.

    I tried to replicate this the next day, using a co-wash, and my hair was a total flop in comparison. All this to say, it’s trial-and-error, which can result in frustration. But if you’re on the market for something fun to obsess over and you can afford to splash out on a few products, it’s some decent light entertainment, although the learning curve is a steep one.

    As you might have gathered, I have in no way figured this stuff out. Some days my hair looks great, but more often than not I’d consider my efforts a ‘miss’ and I make notes and try again the next day (it helps that I wash my hair most days, which means most days are an opportunity for experimentation). I have watched countless curly girl videos on YouTube at this point, and yet despite this influx of knowledge, the painful reality is that each head of hair is different and considerable experimentation is required to figure out what it is our hair needs to look its best.

    What does a bad hair day look like?

    My curls are stringy here, and felt dry. In this instance this result was because I used a styling product that wasn’t compatible with my hair (I believe this was a mousse). For contrast, this is a better hair day (I used the Eco Warrior shampoo bar and the Garnier banana leave-in, but no styling products, so these curls didn’t last long):

    Whilst I am no expert, here are some vital (in my opinion) tips I uncovered while figuring out my hair:

    Curl clump formation is key

    Your success relies heavily on being able to form curl clumps during the washing process. To do this, I use a shampoo (or co-wash) as normal, then apply a conditioner and ‘squish to condish’, an upwards scrunching motion that results in fat curl clumps forming (I prefer to do this with a leave-in conditioner such as the Garnier 3-in-1 Hair Food; I don’t use a curl crème as I’ve found this to be too heavy for my fine, low-porosity hair). I (might, in addition) apply a gel in the same fashion, then when I’m out of the bath I use a microfibre towel and a similar scrunching upwards motion to remove water from my hair. The microfibre towel does a good job of ‘styling’ the hair by simply removing excess water, causing the hair/curls to spring up.

    Brushing through conditioner

    I highly recommend brushing your hair conditioner through your hair. Whether you have curly hair or straight, you will want to do this. Not only does it give a really even application, you will use so much less conditioner this way. It’s also necessary for detangling your hair. I do sometimes brush my hair when it’s dry using a Tangle Teezer, but in general this is frowned upon in the Curly Girl community. To prevent damage, it’s best to detangle your hair whilst wet during the conditioning phase.

    The right products are essential

    You won’t get anywhere without the right shampoo and conditioner. You can check whether your current shampoo and conditioner is CGM-approved by using isitcg.com. Anything with silicones, sulphates, waxes or minerals oils is a no-no.

    Product amount and application matters

    If in doubt, apply styling products to soaking wet hair. How you apply your products matters. I was applying products to damp hair at first, and getting crappy results. I keep all of my haircare products, including stylers (gel, mousse, etc) in my bathroom.

    Learn the various techniques for application (‘squish to condish’, raking, prayer hands, glazing etc) by watching tutorials online, and apply products accordingly.

    Moisture and protein

    Does your hair need moisture or protein? The only way you can really know is to use products that are either moisturising (co-wash, leave-in moisturising masks) or that contain protein (stylers with protein, keratin treatments/masks, shampoos and conditioners with protein, etc) and see what works best. When your hair is balanced, your curls will look their bouncy best. If your curls are starting to go limp, you need to re-balance. I use a lot of moisturising products because my hair is dry, so for me limp curls usually means I’ve over-moisturised and I need to clarify, cut back on the co-wash and maybe even add a protein product (e.g. a pre-wash treatment) to get things back on track.

    You must either allow your hair to air dry whilst down (don’t tie it up!), or diffuse it until dry. I do a combination of both most days so I’m not walking around with dripping wet hair.

    Your hair is unique to you

    You absolutely need to understand your hair, and what your hair needs at any given point. This is the most frustrating part of the process; this isn’t a one-size-fits-all situation. Curl type doesn’t matter (2c, 3b, etc) but hair porosity does, and the best way you can identify this is by taking a strand of your hair and stretching it. Mell, of Manes by Mell, explains it best:

    Manes by Mell Porosity Chart

    You need to know whether your hair needs more moisture or more protein. The aim of the game is to balance your hair in order to get shiny, bouncy, happy curls. Some wash days you might need more moisture, other days you’ll benefit from adding in some protein.

    If your hair is similar to mine (low-ish porosity, fine/medium thickness, medium density, 2c/3a curls), you might benefit from my product recommendations. Here are my current favourites.

    Product recommendations

    Pre-wash treatment: Forest & Shore thrive oil; I let this sit on my hair for 20+ minutes before washing and I seem to consistently get better results when I do this.

    Shampoo(s): Eco Warrior Shampoo Bar for Dry, Curly & Afro hair, the OnlyCurls All Curl Cleanser.

    Conditioner: Garnier Ultimate Blends Banana Hair Food (I use this after shampoo, and I leave it in my hair), the OnlyCurls All Curl Conditioner (I wash this one out, although I might try it as a leave-in one day).

    Co-wash: As I Am Co-Wash; I use co-wash instead of shampoo when my hair feels particularly dry and I know it’ll appreciate the moisture.

    Leave-in conditioner: SheaMoisture Miracle Styler Leave-In Treatment; this smells absolutely INCREDIBLE and is useful for breaking up a gel cast.

    Clarifying shampoo, used on a semi-regular basis to prevent build-up: I’ve been using the Aveeno Clarify and Shine Apple Cider Vinegar Shampoo and the L’Oreal Purifying Shampoo; I’m not sure how I feel about these yet. From tutorials I’ve watched online, the Noughty Detox Dynamo seems to be very popular (and OnlyCurls recommended this one to me, too).

    Styling: At time of writing, I’ve had best results with the Noughty Hey Curl gel, but I have a lot of experimentation ahead of me when it comes to styling products. I want definition more than volume, and I found mousse left my hair feeling a bit crispy. You want your gel to form a ‘cast’ on your hair, which you then scrunch out using a tiny bit of oil (or leave-in conditioner).

    Tools (that I consider essential): a microfibre towel (I bought the OnlyCurls one which I love, but there are bound to be cheaper ones on Amazon), a brush designed for curly hair (e.g. a Denman or a Tangle Teezer – I use the OnlyCurls Denman brush) for brushing conditioner and styling products through hair.

    Knowledge is power. YouTubers I rate: HanzCurls, Manes by Mell, OnlyCurls.

    Although styling curly hair takes a little while, it is easier (in my opinion) than curling tongs, and causes (much) less damage to your hair. That said, during your experimentation phase you will have days where your hair looks crappy or mediocre, and you will long for the guaranteed results of a curling tong. You don’t have to style your hair every time (I certainly don’t do it every day). If you find yourself getting frustrated and wanting to give up, my advice would be to carry on with the CGM-approved shampoo and conditioner, but put zero effort into styling (or use styling methods from your pre-curly days).

    I’m still very much in the experimentation phase, and my bathroom is heaving with different products I am trialling. It is (mostly) fun, though, and there’s something fascinating about the fact that my hair is curly and has always been curly, but I had no way of knowing thanks to the products I was using. If you’re curious, you can invest in some inexpensive products to play with (I’d recommend the Eco Warrior shampoo bar and Garnier hair food conditioner/leave-in to start with) to see if you, too, have naturally curly hair. If you decide to venture up the curly path, don’t forget the ‘before’ photo! Is there anything more compelling than a good before-and-after? I say not.